

























Comprehensive Guide: Self-Installation Window Mesh – The Professional Way to Save Money
The Israeli summer brings with it not only sun and sea, but also less welcome guests – mosquitoes, flies and other insects. The most effective solution for keeping a home ventilated and free of insects is to install Window nets. However, hiring a professional installer for all the windows in your home can be a significant financial expense. This is where the option of Self-installation window netting – A smart, economical solution, and much easier than you might think.
In this guide, based on the knowledge and experience of experts in the field of building maintenance and renovations in Israel, we will review everything you need to know about self-installation window screens: from choosing the type of screen, through the actual installation steps, common mistakes to avoid, to professional tips for ongoing maintenance.
Why should you choose the option of self-installation window mesh?
Many people shy away from the thought of doing installation work at home, but when it comes to mosquito nets, the do-it-yourself (DIY) market now offers advanced and user-friendly solutions. Here are some key reasons to choose this route:
- Significant financial savings: The cost of self-installing window screens is tens of percent lower than hiring a professional. You only pay for the materials and your work time.
- Availability and convenience: There's no need to wait days or weeks for an aluminum installer. Buy the kit at the nearest maintenance store, dedicate an hour or two to the job, and the window is protected immediately.
- Ideal for rental apartments: Many self-installation solutions are based on adhesive or magnets, allowing for easy removal without leaving marks or damage to the window frame when you leave the apartment.
Types of window screens suitable for self-installation
Before you get started, it's important to familiarize yourself with the options available on the market. Not all types of networks are designed for home installation without complex tools, but here are the most recommended and accessible:
1. Mesh with adhesive tape
The simplest and cheapest solution of all the options. It is a flexible fiberglass mesh that comes in a package with adhesive tape with a scotch side. The tape is glued directly to the window frame, and the mesh is attached to it. This solution is mainly suitable for relatively small windows (such as a toilet or bathroom) or as a temporary solution for the summer season.
2. Magnetic window mesh
One of the hits in the home improvement field. Magnetic mesh offers a more aesthetic appearance, better stretch, and higher durability than Velcro mesh. It consists of magnetic strips that are glued to the original window frame, to which a counter-magnetic frame is attached, within which the mesh is enclosed. This is an excellent solution for self-installation window mesh as it allows easy opening, closing, and removal of the mesh for cleaning.
3. Fixed mesh in aluminum frame (assembly kit)
For those looking for a permanent, professional, and durable solution that will last for years (similar to a product that a professional installer would provide). You can now purchase ready-to-assemble kits that include aluminum profiles, high-quality mesh, rubber bands, and connecting plastic corners. The assembly here requires a little more technical sense and basic tools, but the end result is impressive and especially strong.
Comparing costs and solutions: self-installation versus professional installer
To help you make an informed and budget-friendly decision, we have prepared a professional table that compares the different types of window screen solutions, the levels of difficulty in installation, and the estimated costs for an average window (approximately 1 meter by 1 meter in size).
| Solution type | Installation difficulty level | Long-term durability | Estimated cost per window (in shekels) |
|---|---|---|---|
| Velcro mesh (self-installation) | Very easy (no tools) | Low (up to one or two seasons) | 20 – 50 NIS |
| Magnetic grid (self-installation) | Mild – moderate | Medium – High | 80 – 150 NIS |
| Aluminum Frame Mesh (DIY Kit) | Medium – difficult | Very high | 120 – 200 NIS |
| Order a professional aluminum installer | None (professional work) | Very high | 350 – 600 NIS (depending on size and quantity) |
The equipment required for the project
Advance preparation is the key to success in any DIY project. To install a DIY window screen conveniently, safely, and well, make sure you have the following tools on hand beforehand:
- Tape measure (for accurate measurement of the window opening)
- Sharp scissors or a quality Japanese knife (for cutting the mesh and excess)
- Clean microfiber cloth and rubbing alcohol (to clean the frame before gluing – a critical step!)
- If you have chosen an aluminum kit: a small hacksaw (for cutting the aluminum profiles to size) and a dedicated roller for inserting the rubber band into the rail (this accessory is usually provided with the kit).
Step-by-step guide: How to make a self-install window mesh
Follow the detailed steps below to ensure a smooth, durable, and professional-looking installation that will hold up to both winds and the scorching Israeli sun.
Step 1: Accurate measurement
The most important rule in renovation and maintenance work is "measure twice, cut once." Accurately measure the inside of the window frame (length and width). It is recommended to add 2-3 centimeters in each direction if it is a Velcro or magnetic mesh, to ensure that you have sufficient adhesive surface on the frame itself. Write down the measurements clearly on a piece of paper before you start cutting the materials.
Step 2: Cleaning and preparing the surface
This step is critical to the durability of the installation! The adhesive on the mesh strip or magnetic strip will not hold on to a dusty, dirty, or greasy frame. Clean the frame thoroughly with a damp cloth and a little dish soap to remove any coarse dust. Then, go over the intended bonding area with a little medical alcohol (70%) or a strong window cleaner to completely remove any hidden grease residue. Wait for the frame to air dry completely before moving on to the next step.
Step 3: Cutting the Mesh and Frame
Spread the entire mesh out on a flat, clean, and comfortable surface (such as a large dining table or a floor free of any objects). Cut the mesh or magnetic strips according to the measurements you took. Try to cut as straight and cleanly as possible to maintain an aesthetic appearance. As explained below, it is a good idea to leave a little margin that can be cut at the end.
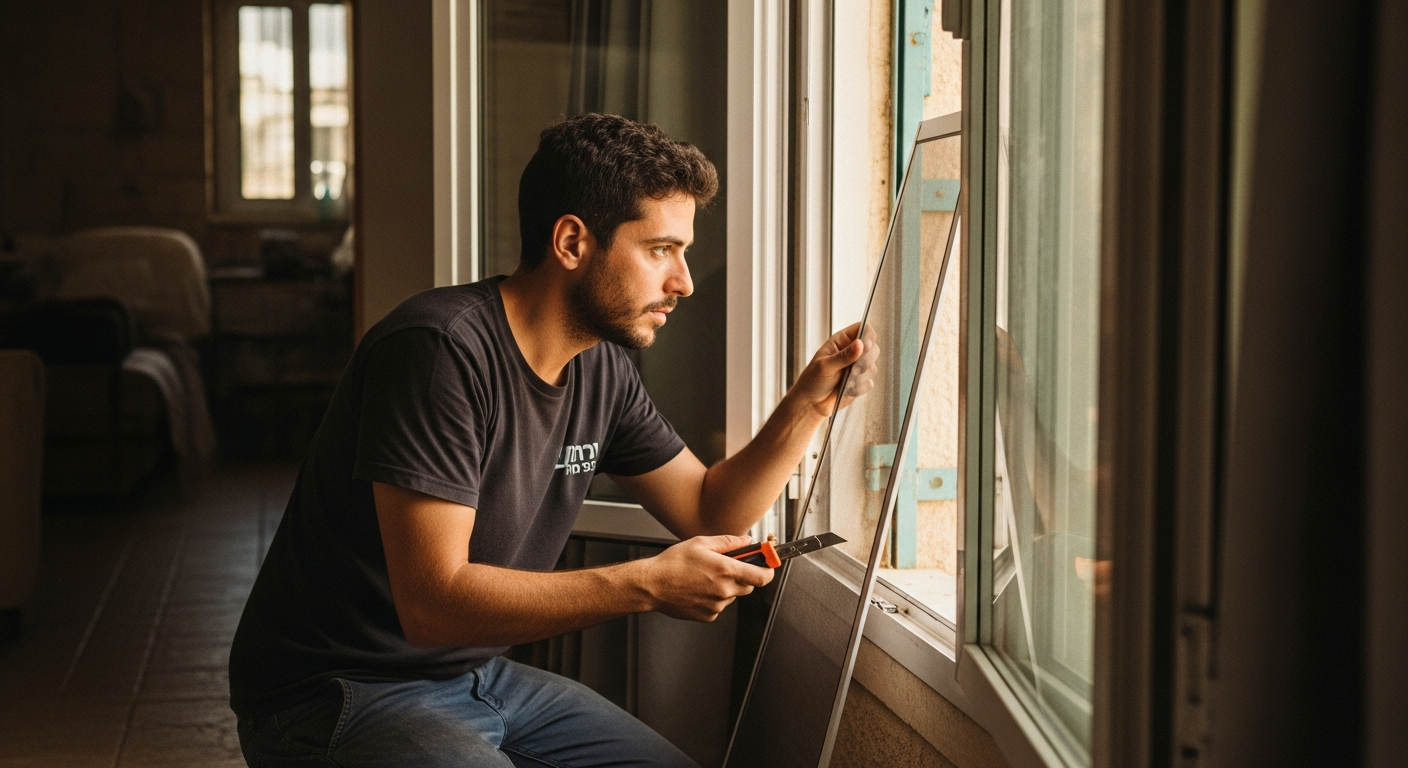
Step 4: Installation and gluing
If you have chosen a magnetic mesh or Velcro solution, peel the protective tape from the double-sided adhesive in small sections (about 10 cm at a time) and stick along the frame while applying uniform and continuous pressure with your fingers. Once the adhesive strip is well positioned, attach the central mesh to it. Start from the top corner and gradually move downwards, while gently stretching the mesh to avoid wrinkles or a bulge in the middle of the mesh.
Step 5: Finishing and testing
Once the screen is in place, go around the entire perimeter of the window and make sure it is tight and taut on all sides. If there is any leftover screen protruding beyond the magnet or Velcro frame, gently run a sharp Japanese knife close to the frame and cut off the excess for a completely clean and professional look.
Common mistakes when installing window mesh and how to avoid them
Even relatively simple do-it-yourself projects can go wrong if you don’t pay attention to the little details. Here are some common mistakes people make when choosing a do-it-yourself window mesh option, and the right way to proceed:
- Overstretching the network: A very common mistake is to stretch the fiberglass mesh too tightly when gluing or when inserting the rubber band (in an aluminum kit). Overstretching can bend the window profile inward or cause the mesh to tear at the edges due to high tension. The stretching should be gentle and precise, only to the extent necessary to prevent wrinkles.
- Skipping or neglecting the cleaning step: As we emphasized, sticking a Velcro or magnet mesh to a dusty frame that has only been lightly wiped will lead to the glue drying out and the mesh falling off within a few days in the Israeli sun. Don't skip a thorough cleaning with alcohol!
- Cutting too early and too short: Do not cut the mesh to the exact size of the opening before completing the installation. Always leave a margin of 3-5 centimeters on each side, perform the installation and stretching, and only at the end, when you are sure that everything is seated properly, cut off the excess.
Tips from professionals for maintaining window screens
Have you successfully installed the screen? Great job! Now the goal is to maintain the result in the long term. Proper maintenance of window screens will ensure that they will serve you faithfully for several seasons, allowing clear air to enter and preventing the ingress of dust and insects.
- Periodic dust cleaning: Dust and soot tend to build up on the mesh holes over time, blocking airflow and obscuring visibility. Clean the meshes once every two months using a vacuum cleaner with a soft brush head (on low suction) or a damp microfiber cloth.
- Gentle wash at the end of the season: If you have installed a magnetic mesh or a removable aluminum mesh, it is recommended that you remove the mesh every six months, take it into the shower, and gently wash it with running water at room temperature and a little dish soap. Strictly avoid using hard scrubbing brushes that can tear the fiberglass fibers.
- Repairing small, spot holes: Have you discovered a small tear? There's no need to immediately replace the entire screen and redo the job. You can purchase special repair stickers for window screens at hardware stores that will close the hole in seconds, preventing mosquitoes and flies from entering, and will also stop the tear from expanding.
When is it still best to call a professional?
Although the benefits and savings of self-installation window screens are completely clear, there are more complex situations in which it is recommended to consider contacting a professional aluminum or screen installer. For example, when it comes to huge windows or display cases that open onto a balcony or garden, the installation of sliding rails and screens is often required, which require precise adjustment and heavier tools. Also, windows in emergency rooms require massive roller screens with a tension spring, or apartments on very high floors where access to the outside of the window is difficult or dangerous.
Additionally, if you have pets (cats or dogs) that tend to jump or scratch the window, a professional can install a reinforced "transparent mesh" or a dedicated anti-tear mesh (pet mesh), which is much thicker and requires strong tension and dedicated aluminum profiles that are almost impossible to install with adhesive alone.
Summary
The option of carrying out a self-installation window screen project is the ultimate solution for anyone looking to upgrade the quality of life in their home, prevent pests from entering, and all while staying within a reasonable and economical budget. With a short learning curve, choosing the right type of screen (such as a high-quality magnetic screen that is easy to assemble), basic equipment, careful measurement, and patient work according to the steps we have outlined, you can achieve impressive results that are not much inferior to the work of an installer. Always remember that proper and gentle maintenance of window screens will ensure you clean air, a clear view, and a home free of bugs all year round. Get started and good luck with your next project!